Transferring Email From Hamilton to Another Account
Last updated: December 1, 2022
Tags
The following instructions assume you normally access your Hamilton email through the HillConnect web interface. These instructions will show you how to transfer messages from your Hamilton email to your personal email account using a free email client called Thunderbird. Please note that Thunderbird is used here only to facilitate the email transfer and can be uninstalled after it has served its purpose.
- Google has a transfer program available that simplifies transferring your Hamilton mail and Google Drive contents to a (non-Hamilton) Gmail account. Instructions for it are available from Google.
Note: The following instructions will work for most non-Gmail account providers (Yahoo Mail, Hotmail, AOL, etc). During the setup process, if Thunderbird does not find your settings automatically, you will have to enter them manually. Your Hamilton settings are shown below. If you do not know the correct settings for your non-Hamilton account, you will need to obtain them from your account provider (Yahoo Mail, Hotmail, etc.).
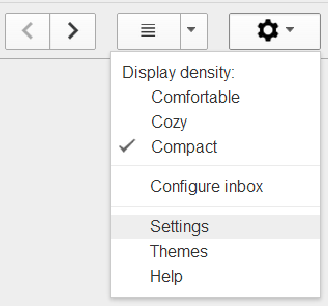
- First, if you have not already done so, login to your Hamilton email account at http://hillconnect.hamilton.edu. Once you're logged in, go to Settings. (This is accessed by clicking on the gear shaped icon at the top right corner and then choose Settings from the drop down list.)
- From Settings, select Forwarding and Pop/IMAP then choose Enable IMAP. Reminder: You can click on the image below to see a larger version of it.
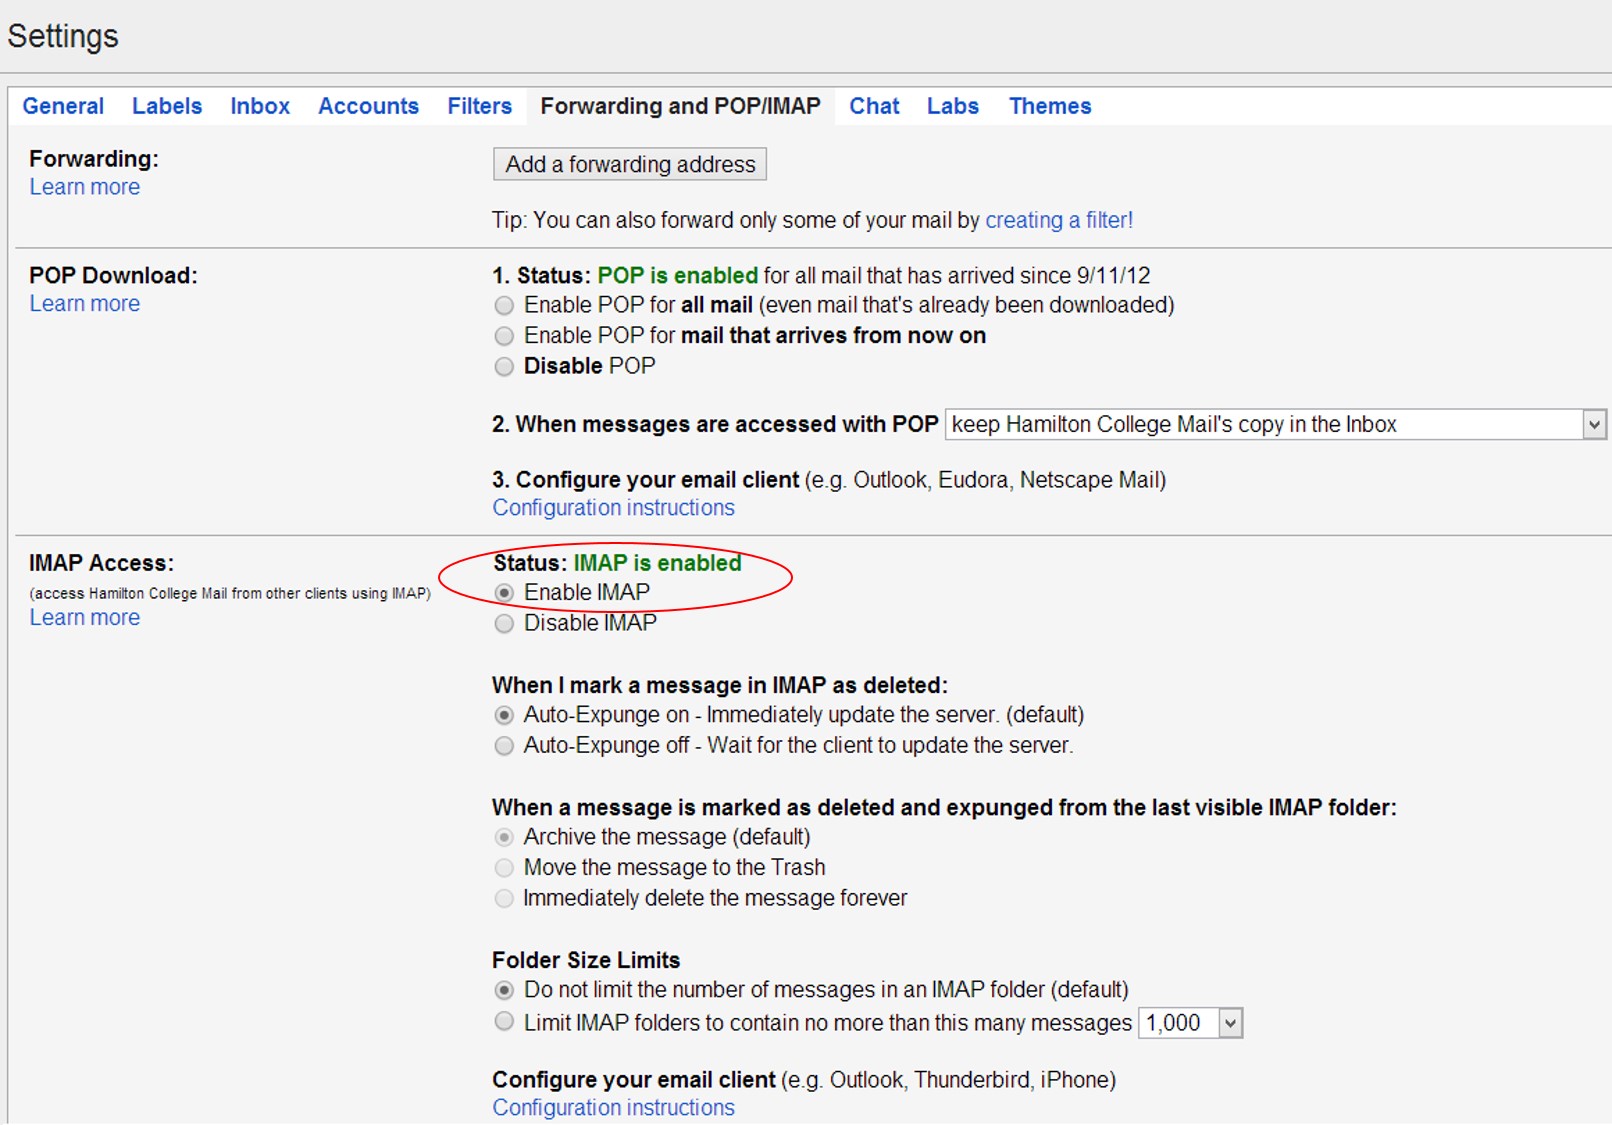
- Click on Save Changes at the bottom of the screen and then log in to your personal Gmail account where you will repeat these steps for that account.
- Once this is complete, if you have not already done so, you should consider setting up a "Vacation Responder" in your Hamilton account. This too is done from the Settings menu shown in step 1 above. On the General tab (usually the default tab that opens), scroll down to the bottom where you'll find the Vacation Responder section. If you do not want to enter an "End Date", uncheck the box next to if it is checked. Otherwise, fill in the information requested and then click on Save Changes at the very bottom of the Settings window.
Note: If transferring mail to a non-Gmail account, you will have to enable IMAP from the settings for the account. If you don't know how to do this, you can check the online help that comes with your other account.
Installing Thunderbird
Go to http://www.mozilla.org/en-US/thunderbird/ to install the latest version of Thunderbird on either your Windows or Macintosh computer and follow the instructions built-in to the installation. Once Thunderbird has been installed, follow the instructions below.
Transferring Email Messages
Reminder: click on the images below to see a larger, clearer image.
- In Thunderbird, click the Tools menu and select Account Settings.

- Click on the Account Actions option found on the bottom of the left pane and Choose Add Mail Account...

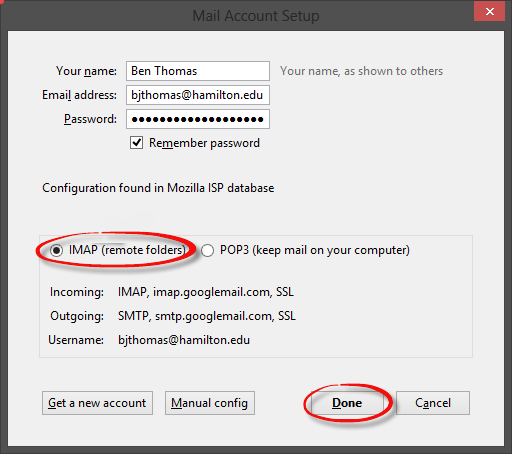
- Enter your account details for your Hamilton account and select Continue.

- Verify that IMAP is selected and click Done.
- Repeat Step 2 and Step 3 to add the email account that you want to transfer the emails to and then select OK to close the Account Actions pane.
- Depending on the number of messages, it can take a while for Thunderbird to download all your mail. WAIT FOR THIS TO FINISH before continuing with the next step.
- Once all your mail appears in Thunderbird, you can begin the transfer process by highlighting all the messages you want to transfer. You can copy messages from your Hamilton Inbox or a Hamilton folder/label into your new Inbox but if you want to maintain the same folder/label structure that you had at Hamilton, you will need to create the folder/label in your new account first. Once you're ready to move your messages, proceed by clicking in the folder that contains the messages you're ready to move. Then click on "Edit" in the menu bar and then click on "Select All".
- Once they are highlighted, return to the Thunderbird menu, click on “Messages” and then mouse over "Copy To". Move the mouse to select the inbox or other mail folder into which you want to copy the messages. Once you click on the folder to which you want the messages moved, a transfer will begin. Thunderbird will display the progress at the bottom of the page.
Note: Depending on the number of messages you've selected, this can take anywhere from a few minutes to an hour or more. It is important to be patient. - Once the process is complete, login to your gmail.com email account in the traditional way by opening your preferred web browser (Safari, Firefox, etc.) to verify that the messages have been transferred.
- If you no longer wish to use Thunderbird, you can uninstall it from your computer as it has served its purpose.
Comments
Contact
Team Name
Help Desk
198 College Hill Road
Clinton, NY 13323
Fri 8 a.m. - 8 p.m.
Sat - Sun 10 a.m. - 10 p.m.

No comments yet.
Comment Guidelines
Please log in to post a comment