Blogging with WordPress
Last updated: March 7, 2019
Related Documents
Blogging
A blog is simply a website that lists posts (or blog entries) in reverse chronological order. Blogs are a terrific way to share your ideas online and invite others to comment on your ideas. Modern blogging platforms. such as WordPress, allow for the embedding of multimedia, such as images, audio, and video into your posts. WordPress even has a feature that will capture website content and post it directly to your blog. If you are looking for the most powerful blogging platform that is supported by Research and Instructional Design, put WordPress at the top of your list.
Getting Started
Go to www.reclaimhosting.com and request an account. At the time of the writing of this documentation the cost is $30 per year for hosting, with the purchase of the domain name (e.g. www.yourname.com) being included in the initial $30 fee.
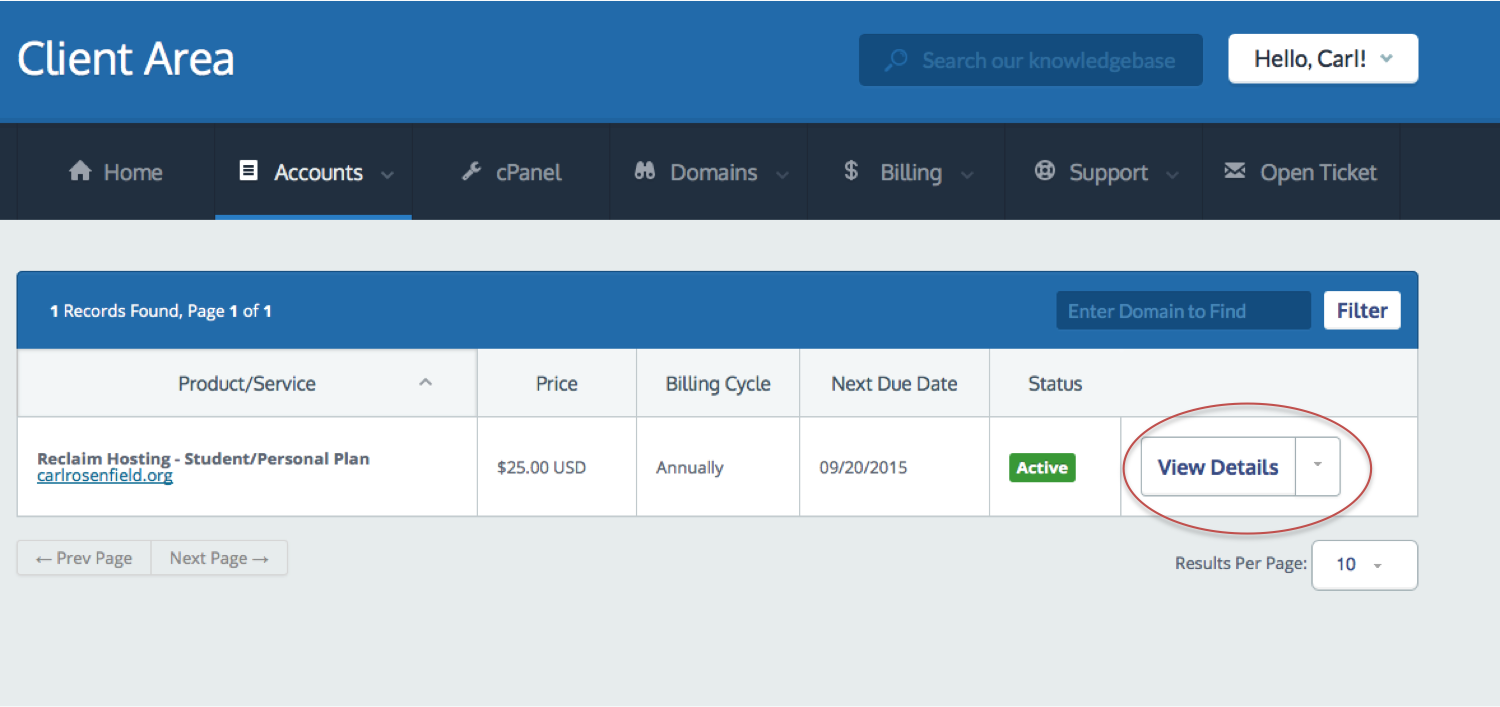
After your account has been set up, go to the client area and explore the information and options under Accounts. Click on the View Details dropdown menu. This is where you can change your account password.
To actually create a WordPress instance, click on the cPanel button in the main navigation at the top of the page. From the list of possible applications to install, select WordPress blog, then click the install this application button.
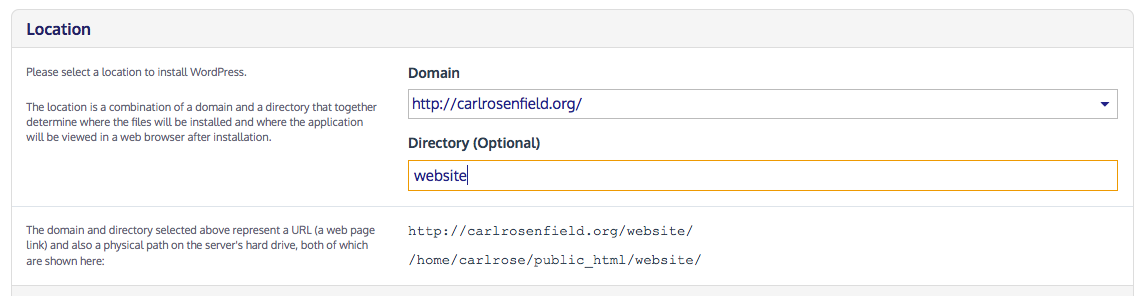
On the resulting screen, you are given the option to install WordPress directly to the root of your domain, or create a sub-directory to contain your website. If you are going to be creating multiple blogs, the best choice is to install WordPress to a sub-directory.
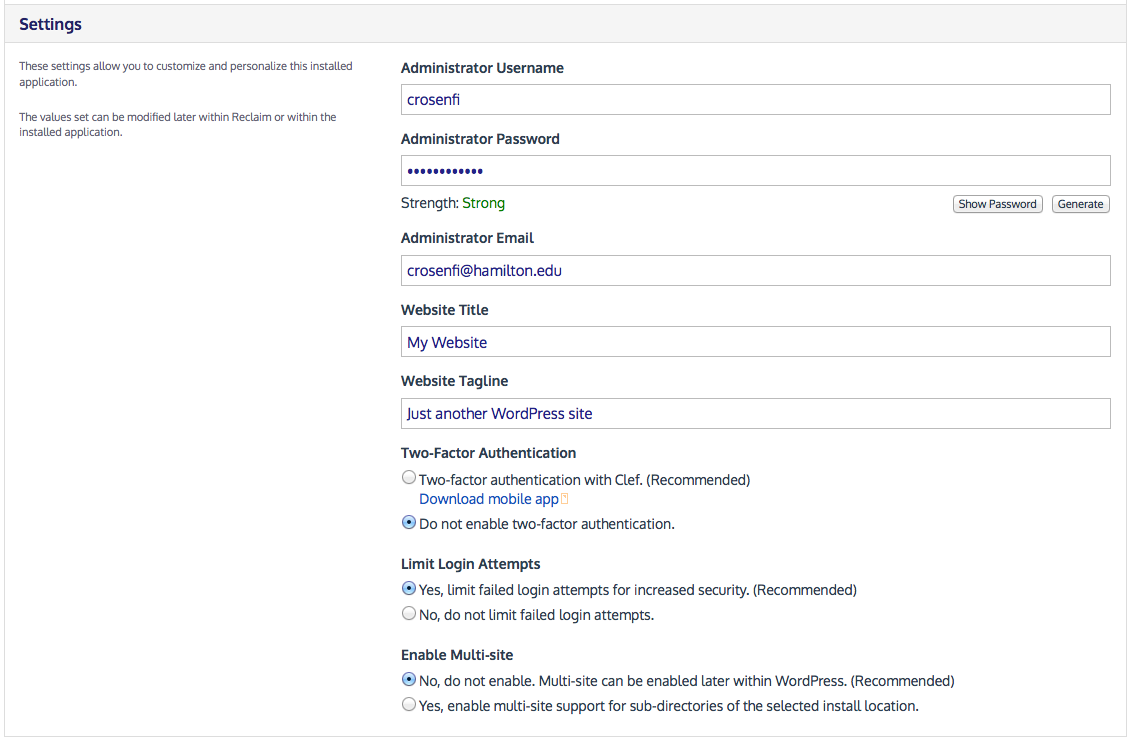
In the Settings section, change the Administrator Username to a username of your choice, and enter a secure password. Enter your email address in the Administrator Email field, and then enter the website title and tagline. We recommend that you do not enable two-factor authentication. Choose whether to limit login attempts and then select No, do not enable under Enable Multi-site. When you have finished, click the Install button at the bottom right of the page.
To view or edit your website details at a later time, just go back to the cPanel and click on the icon for your site.
Dashboard
You will manage your blog and its content from your Dashboard. Most of the tools you will use are located in the menu at the far left.
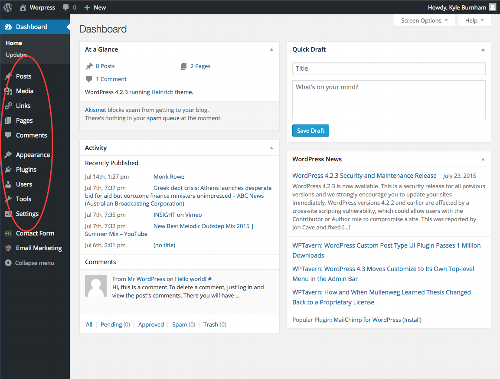
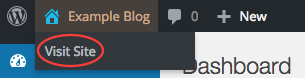
To switch between your site view and dashboard view, click the name of your blog in the top left corner.
Adding a Theme
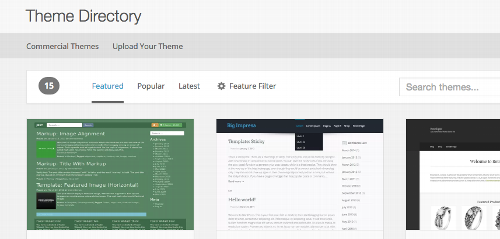
If you would like to change the appearance and layout of your blog, you can do so using WordPress themes. There are both free and paid themes available for installation on your WordPress site. To add a theme, go to Appearance -> Themes in your WordPress dashboard. On the Themes page, click Add New.

Find a theme that suits your purposes; advanced users may be interested in the searching with the Feature Filter.
Select your chosen theme and click Install; after installation, you will be prompted to preview the theme, activate the theme, or return to the theme installer to search for more themes. To apply the theme to your site, click Activate. You can change your theme as many times as you want. Be aware that changing a WordPress theme may have repercussions. Please explore this article to see how your WordPress site may be affected.
Installing Dependent Plugins
Many themes require plugins, small helper applications, for WordPress to display your site using that theme correctly. WordPress will alert you of any needed plugins upon installation of the theme. If the installation prompts you to add a plugin, such as FormGet for forms, follow the onscreen instructions to install the theme.

Customizing Themes
You can make basic modifications to your theme from Appearance -> Customize. From here, you can modify items which appear on the whole site, such as the Title & Tagline, Colors, Header Image, Background Image, Navigation, Widgets, and whether you want a Static Front Page or you want your latest posts to be the front page of your blog. Make sure you click Save & Publish when you are done customizing.
Adding Users
You can give access to your WordPress blog by adding users. Users can be assigned different roles depending on what level of access you would like individuals to have within your site.
To add a user from the dashboard, go to Users -> Add New. Provide a username, email, and password. You may also add a first name, last name, and website to the user’s profile. You can chose to send the user their password by email (recommended).
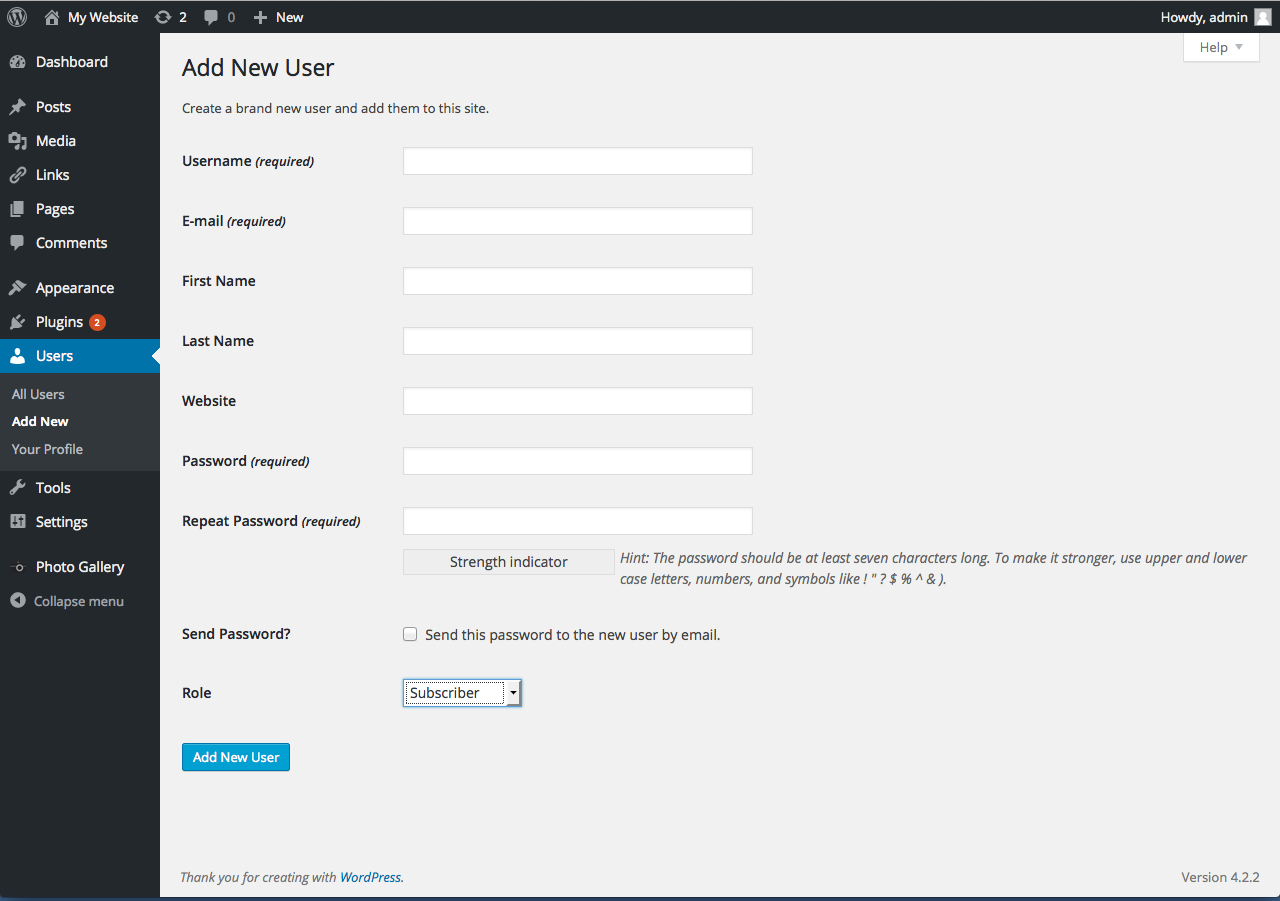
Chose a role for the user from the role menu:
- Administrator – nothing is off limits.
- Editor – has access to all posts, pages, comments, categories, tags, and links.
- Author – can write, upload photos to, edit, and publish their own posts.
- Contributor – has no publishing or uploading capability, but can write and edit their own posts until they are published
- Subscriber – can read and comment on posts and pages
For more about user roles visit the WordPress support site document on user roles.
Edit User Role and Profile
To edit a user and change their role, go to Users -> All Users. Hover over the user you want to edit, and click the Edit button that appears under their name. This takes you to a page where you can modify the user’s profile and update their role. You can also add contact information and a short bio, as well as change the user's password.
Posts
Posts are the main focus of a blog. By default, they display chronologically, with the most recent first, on the front page of your blog site.
Add Posts
From the dashboard, go to Posts -> Add New. From this page, you can give your post a title and add content, using a handy visual editor similar to most word processors to write and format text, images, or videos: whatever you want in your blog. If you'd like the visual editor to look even more like a word processor, you can install a plugin called TinyMCE Advanced. A text editor tab is available for HTML editing, but you likely won’t need to use it.
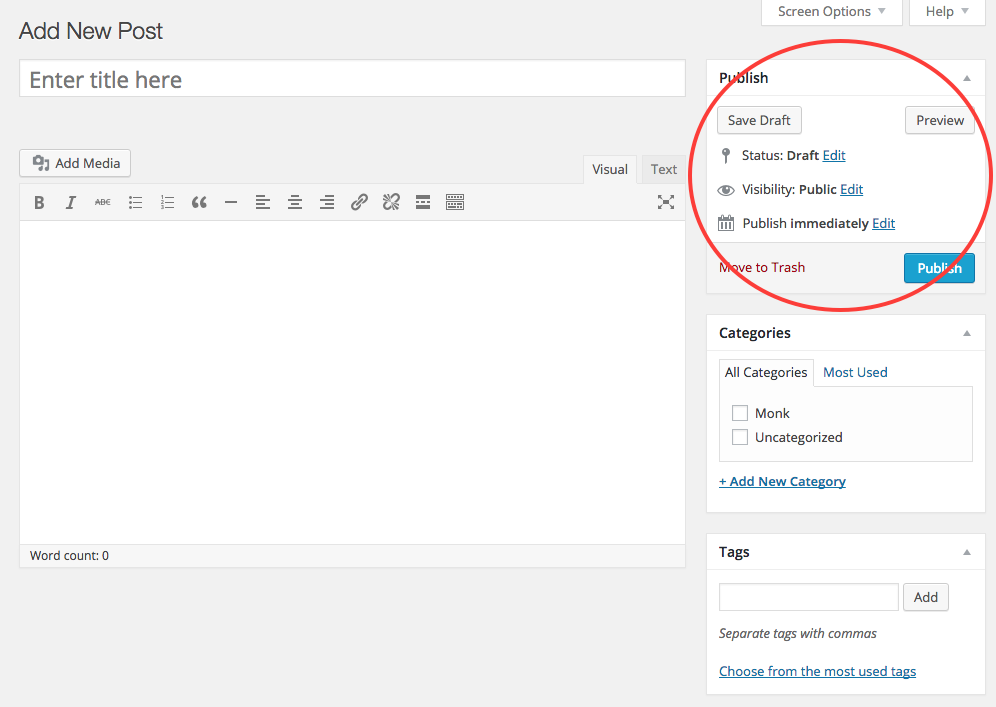
The Publish settings, on the far right, give you the options to preview your post, save it as a draft, and publish it. You can publish it immediately, or set a date and time for it to be automatically published later. You can change the visibility settings from public to private or password protected. From the visibility settings, you can also make a post “sticky,” that is, always show up on the front page instead of moving along as more posts are added, by selecting Stick post to front page. This may be useful if you have information you want to be seen or noticed before the other posts, such as guidelines for your blog or links to an important article. You can make a post un-sticky by unchecking the box. After you make any changes to the settings in the Publish box, click Update to save the new settings.
The Format settings, also on the far right, allow you to change way the post is formatted and displayed in a way that best fits your content. Your options are available based on the theme you have, and may include Standard, Status, Link, Image, and more.
Lastly, Feature Image, if your theme supports it, can be found at the bottom of the far right column, and allows you to set an image to feature prominently above your post title.
Manage Posts
Manage your posts from Posts -> All Posts. Here you can quickly see the title, author, categories, tags, comments, and publication date for each post. You can search by date or title by clicking on those columns, or by a specific month or category from the menus next to the Filter button. Clicking on a specific author, category, or tag, will show you all the posts by that author or with that category or tag. Clicking on the comment icon will take you to an informative table of all that post’s comments.
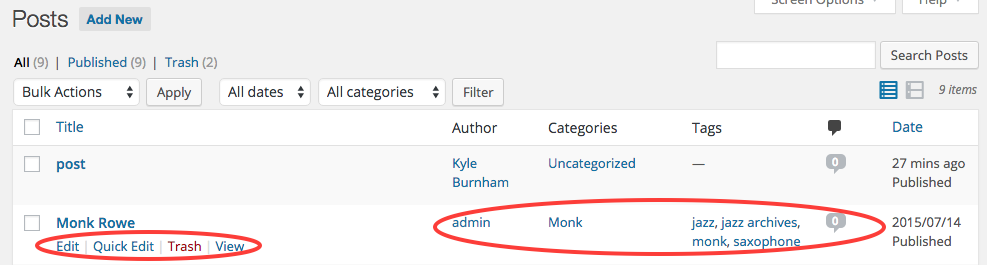
Hovering over a post gives you several options. Edit takes you to the visual post editor. Quick Edit allows you to change the data associated with the post, such as the name, categories, tags, date, author, stickiness, and whether you allow comments. Click the Update button to apply any changes.
You can also View or Trash your post from here. If you’d like to restore a post from Trash, delete a post permanently, or clear your trash to delete all trashed posts permanently, click the Trash button from the menu bar above the table of posts.
Tagging Posts
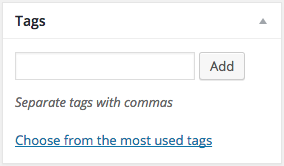
Tagging posts can be useful for keeping your blog organized and helping readers search for and find posts. You can add tags from the post editor, using the Tags box in the right hand column. The Tags options is after Publish, Format, and Categories.
Your tags should be specific descriptive words or phrases which relate to the post, such as “Jazz,” “Monk Rowe,” or “Saxophone.” A category is a broader description, like “Music,” and is automatically reflected in the post’s URL (e.g. domainname.org/sitename/category/post-name or carlrosenfi.org/carlsblog/music/monk-rowe). For more on the differences between tags and categories, and what makes a good tag, see WordPress’s documentation on Tags vs. Categories.
You can manage tags from Posts -> Tags. This allows you to see what tags you are using, how many times each tag is used and the posts with which each tag is associated. To see all posts using the same tag, click on the Count number in the far right column for that tag.
Managing Media
From the dashboard, go to Media -> Media Library to manage images and video and audio files. In the media library, you can add images to use later, delete images you no longer need, and search by date, file type, or keyword.
Click on a file to add a caption, alt text, and description. You can also perform basic edits, such as cropping, rotating, flipping, and scaling, by clicking Edit Image.
Adding Media to Posts
You can add media to your post directly from the post editor, by clicking the Add Media button. This pops up the media library, with any files already uploaded, and also lets you upload new media. You can set captions and alt text from this window; you can also perform basic edits like rotations and crops from the Edit Image button under the attachment details.
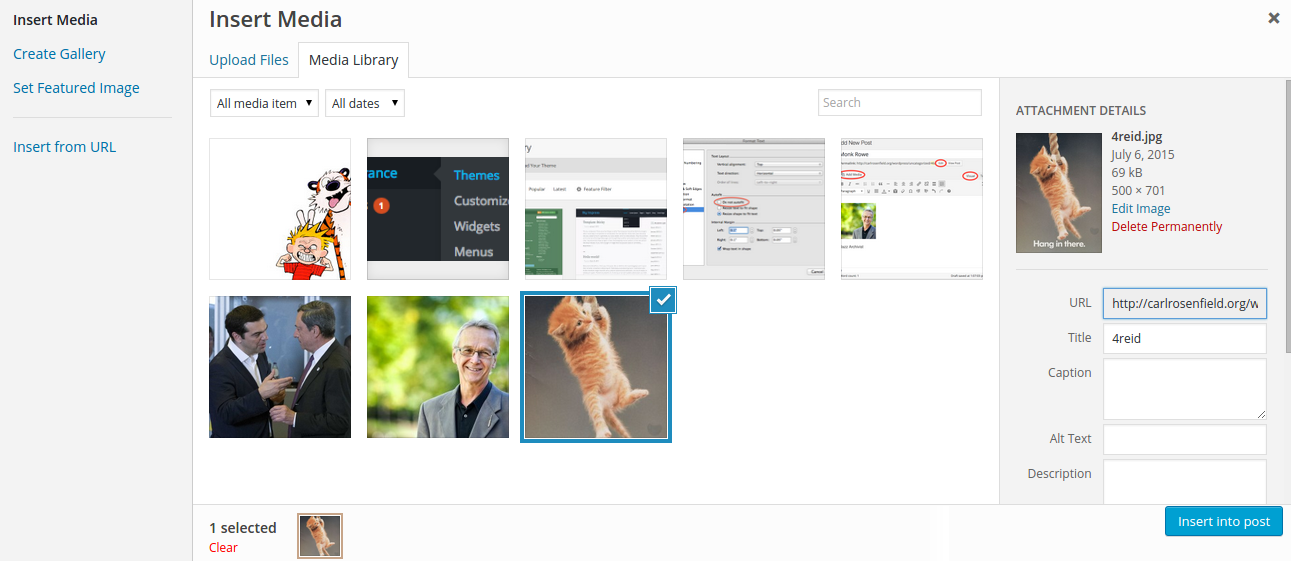
After inserting the file, you can edit it by clicking on it and selecting the pencil icon. From here, you can change its size to a preset or custom size, change its alignment, and add a caption. You have the option to edit the original, which provides the same options as Edit Image discussed above.
Pages
Pages are static; they do not change unless you edit them, such as an about page or contact page. They are used for websites, but not used much with blogs. Pages are different from posts, the main substance of a blog, which display based upon publication date (newest appearing first), stacking on top of one another.
To create a page, go to Pages -> Add New. Making a page looks very similar to making a post, but it will appear as a separate page, accessible from the site’s menu.
To edit and manage pages, go to Pages -> All Pages.
The WordPress support site has more on the difference between pages and posts.
Comments
You manage comments from the Comments section accessible from the left hand menu of the dashboard. From here, you can approve, unapprove, and edit comments, or send comments to spam or trash.
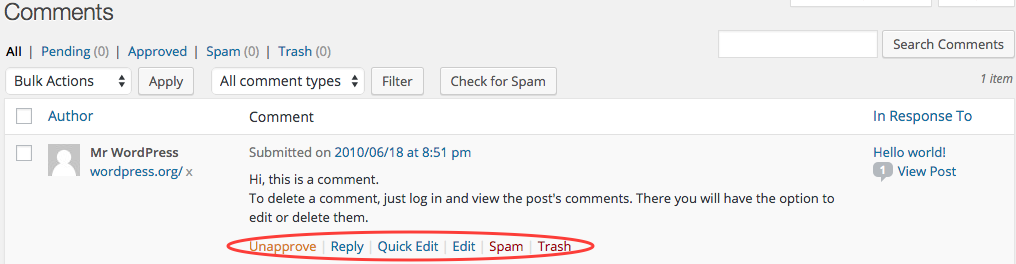
Depending on your Discussion Settings, you will have to approve comments before they appear on your blog. For more on moderating comments, see the section on Discussion Settings below. For more on spam protection, see the section on Akismet Settings.
Press This
If you frequently quote from articles, or post links or videos from around the web, on your blog, then Press This is a feature you may be interested.
Press This is a bookmarklet, a software application accessed from the bookmarks bar which allows you to interact with the web page you’re currently on. Press This quickly and easily enables you to grab text, images, or video from any webpage, or to simply share a link to the webpage.
To use Press This, go to Tools -> Available Tools. Follow the instructions to drag the Press This bookmarklet to your browser’s bookmarks toolbar—you may need to tell your browser to show the Bookmarks Bar if it’s not visible.
When you are on a webpage you would like to share on your blog, simply click the Press This button in your bookmarks bar. A new window will pop up with the post editor, auto-filling the post title with the title of the webpage and including a link to the page in the body of the post. It will also show any images or video you can use right above the editor’s toolbox; simply click on the image to insert it. You can edit the post and title as much as you would like here, as well as publish the post or save it as a draft.
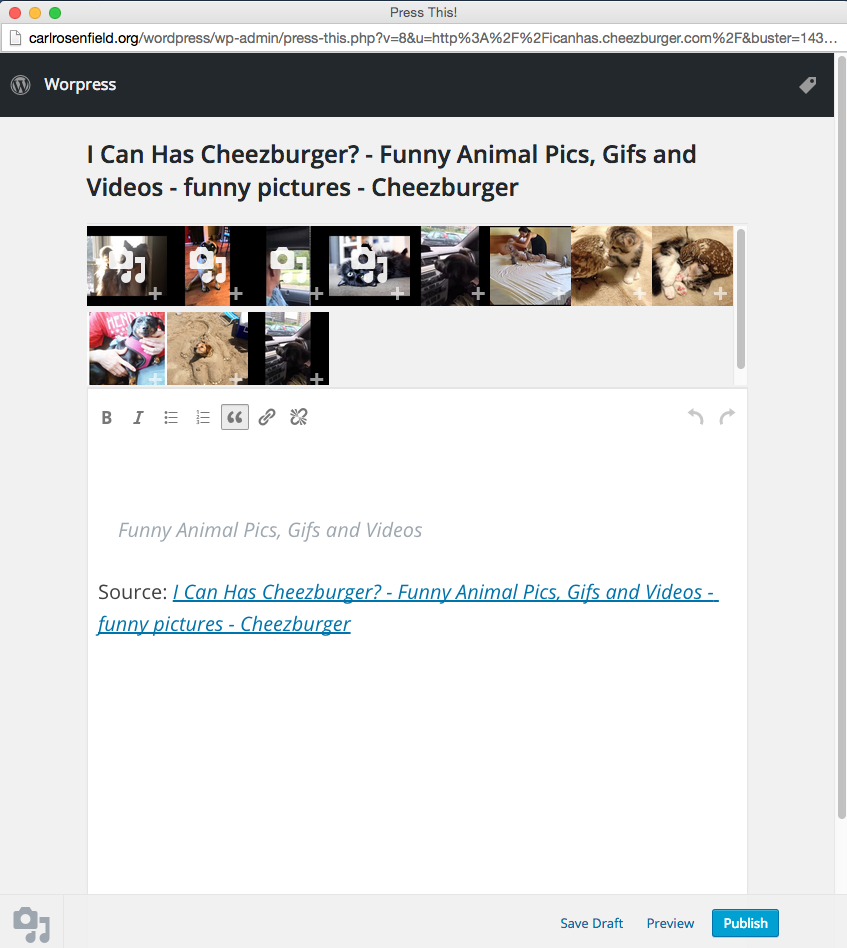
If you want to post a quote from an article, highlight the desired text before clicking Press This, and the highlighted text will be automatically inserted as a quote.
Exporting and Importing Your Blog
To export the content of your site, go to Tools -> Export. This exports all posts, pages, comments, custom fields, categories, and tags as an XML file, which you can import to another WordPress site, or save as a backup for your current site. To import a previously exported XML file, go to Tools -> Import and select WordPress from the list of systems from which you can import.
For a more comprehensive Export/Import process, at the time of writing we recommend the plugin All-In-One WP Migration. This enables you to seamlessly copy a site for backup or to import whole into another WordPress installation.
Settings
WordPress offers a variety of settings to further manage your blog. We're going to go over the most likely relevant settings, but you'll see more types of settings available in your dashboard.
General
General settings allow you to change the title of your blog, your tagline, date and time settings, language settings, the site address, and the email address associated with the site.
Reading
Reading settings are for changing the way your site displays posts on the home page. You can create a static home page (i.e. the posts appear on a different page from the home page), how many posts are shown per page, whether it displays the full post or just a summary in a feed. You can also discourage search engines from indexing your site.
Discussion
Discussion settings are for comments and comment moderation. Do you want only users who are logged into your site to comment? Do users need to supply a valid email? Should all comments be manually approved by a moderator? Are there certain words, or even email addresses, you'd like to always send to spam? Settings for these and similar are found on this page.
Media
The media settings allow you to change the default sizes (in pixels) for images and thumbnails.
Permalinks
From permalinks settings, you can modify the way the URLs for individual posts are displayed. For example, the URL could be based off publication, date, the name and category of the post, or just a number in numeric order.
Akismet
Akismet is an incredibly useful plugin which catches most spam comments and flags them to your spam folder. While you don't need it to run a blog, you’ll probably want to set it up to help manage the spam from bots which inevitably post on your page.
To activate Akismet, click on the Get your API key button. This will take you to an Akismet.com page where you will follow a link to Get an Akismet API Key. You will be prompted to create an account with Akismet by entering your Email Address and creating a Username and Password. Chose the Basic Plan and click Get Started.
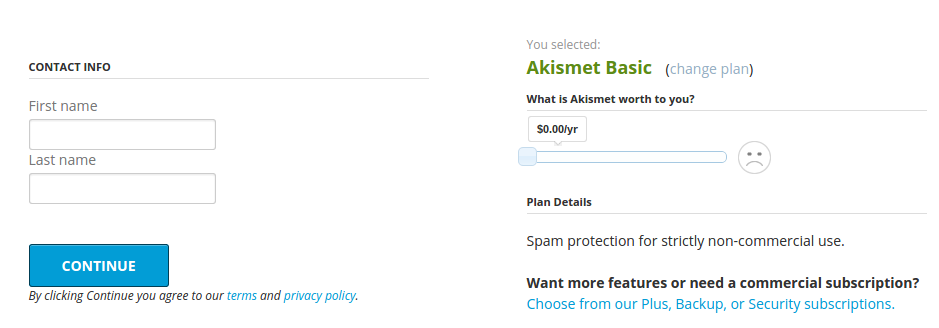
Move the price slider to $0, enter your First Name and Last Name, and click Continue. This will generate an API key to activate Akismet for you blog, which you can copy and paste into Akismet Settings in your WordPress dashboard, or you can click Automatically Save Your Akismet API Key, which should take you to your blog’s Akismet Settings and set up Akismet for you.
Comments
Contact
Team Name
Research & Instructional Design
198 College Hill Road
Clinton, NY 13323

No comments yet.
Comment Guidelines
Please log in to post a comment